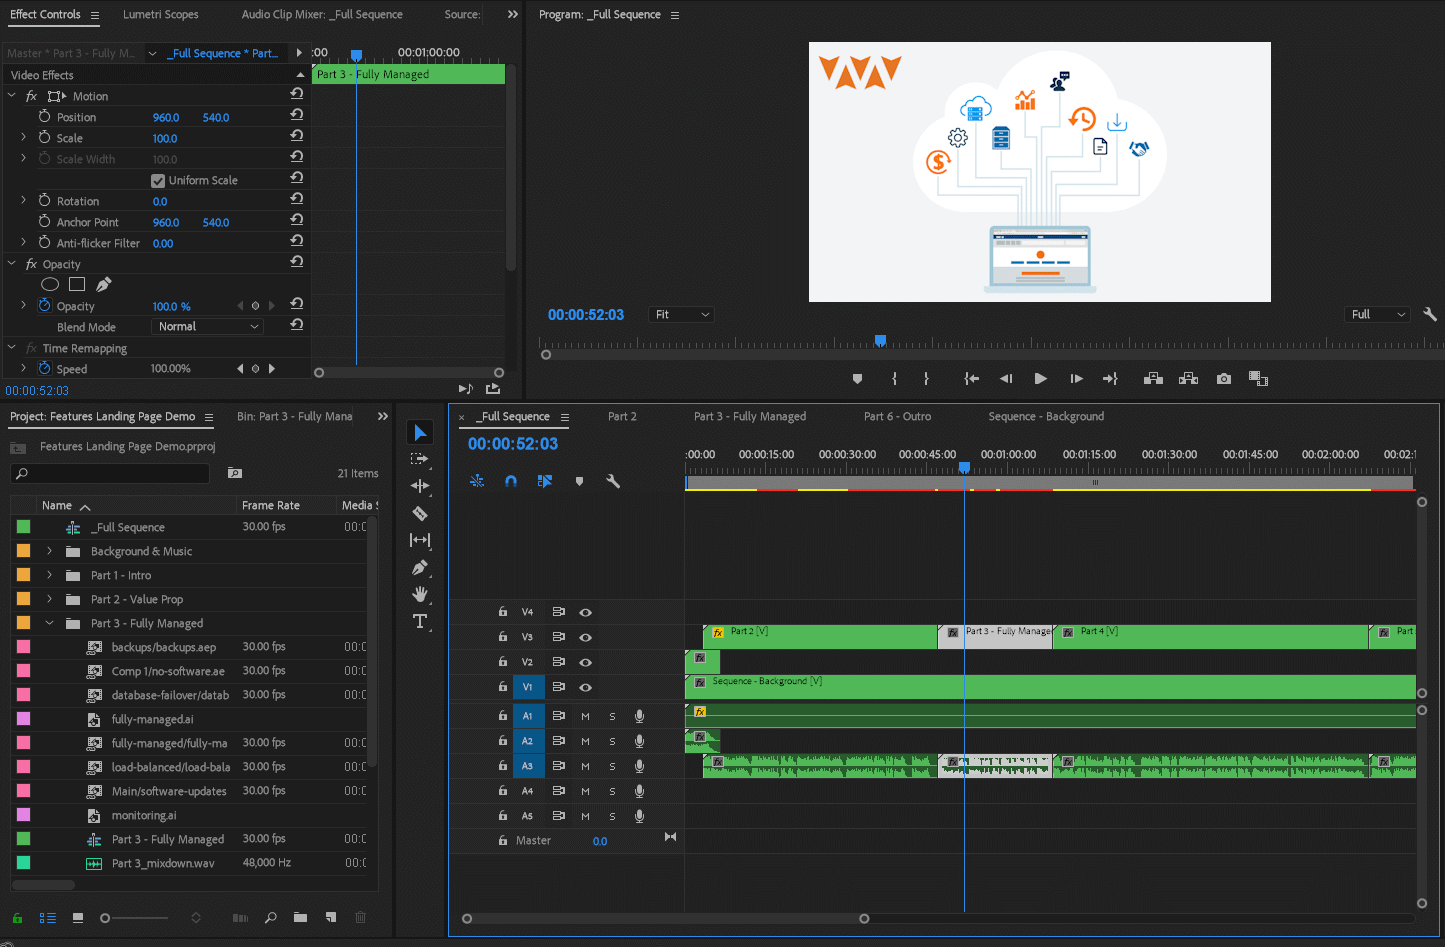
I just uploaded my first serious and professional promo video to YouTube. You can watch it below:
This is yet another dangerous example of me working in my business and not on my business (thanks for the guilt trip, Michael Gerber). I'm pretty good at working in my business. I like to learn and build new things and it doesn't really matter too much what the "thing" is, just that I'm actively creating something.
Before, I spent too much time helping build Marketpath CMS. Now, this is actually helping to sell and promote the product. I've at least shifted into a business role where I'm closer to "working on" the business.
Lucky for you, the point of this post is not to drivel on about my approach to building a business. It's about creating a professional quality video and all the hardware, software, and processes required to make it happen.
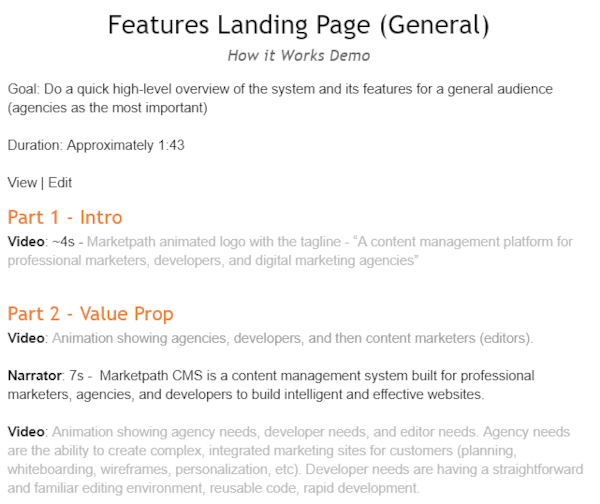
The planning, otherwise known as storyboarding, of this video started in a Google Docs file. It looked like this:
But this quickly grew a bit unwieldy so I switched it to Google Slides. A Microsoft Powerpoint file would work just as well. This board-based format made it a lot easier to visualize the video's flow. And since it was in Google Slides, it allowed others on our marketing team to comment and suggest changes.
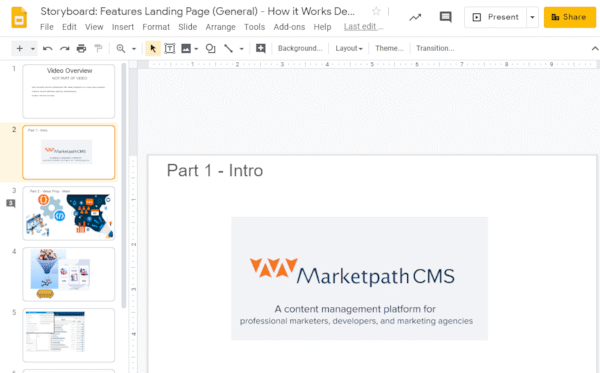
The planning, writing, and revisions to the storyboard took about a month. Keep in mind, however, that there was a great deal of work done prior to this to determine our target customers' various personas. This video is a general video that tries to appeal to all three of our primary personas and will be featured on our Features Overview landing page. Soon, we'll create videos that specifically target each persona.
The storyboard is comprised of parts and sub-parts (my non-professional name for them). The part was the primary theme for the sequence of videos. For example, two main parts were the introduction, which showed the logo and tagline, and the main value proposition which had four or five sub-parts to it. Each board (sub-part) contained ideas for images, video and animation, and the exact script that would be spoken during the video.
With the storyboard complete and the script finalized, I began recording the audio. The equipment used to record audio is incredibly important. This can easily be the difference between a professional sounding video and a very amateur video. The microphone, ambient noise, a wind/pop screen, the computer interface, and the recording software all matter.
Here is a comparison of two videos with my voiceover.
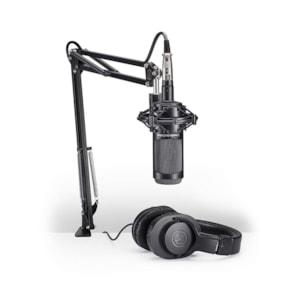
The first uses a $40 Sennheiser headset and the second uses a $99 Audio-Technica AT2035 Cardioid Condenser Microphone. I actually bought the Audio-Technica AT2035PK kit for $199 and that came with a shock mount, adjustable boom, cabling, and headphones.
Recording with Sennheiser Headset
Recording with Audio-Technica AT2035
I hope you can hear the difference. It's pretty drastic. In all fairness, I did run the second video through Adobe Audition and applied some filters to improve the sound. Even with that, though, there would have been a big difference. Condenser mics capture very rich detail in the audio that the other mic just can't compete with.
You can go hog wild with audio equipment and spend thousands of dollars. I did a lot of research and kept it fairly cheap.
In addition to the microphone and its accessories, you'll need a USB audio interface. The microphone plugs into the interface and the interface plugs into your computer via USB cable. I used an older Presonus AudioBox I've had for several years. You can get this now for about $99.
There are many other interfaces available. Even some that have full mixing boards with a main or multi-channel USB output. Keep it simple when you get started. The more goodies and features your hardware has the more time you'll spend configuring it.
I used Adobe Audition to record and master the audio. I recorded one track for each part and sub-part. This allowed me to redo the parts later if something needed to change rather than recording the entire duration.
I recommend keeping a log of the settings you used in the recording software, the levels, and effects settings used on the interface, and even the ambient noise details when recorded. The last thing you want to do is record everything again because you can't match the audio quality.
When it comes to the environment or room where you record your audio there are two important factors to consider - ambient noise and acoustics.
Ambient noise is the noise that is present during the recording. This can be the heating and cooling (HVAC) system, the mowing crew outside, dogs barking, people talking, your squeaky chair, the sounds your keyboard makes, and much more.
I recorded this video in my office which has a loud HVAC system that is constantly running. The condenser mic easily picked this up in the playback. Fortunately, I was able apply a noise cancelling filter in Audition. You have to be careful with these types of filters, though. They can filter out some of that rich audio you were trying to achieve in the first place.
Room acoustics also play a major factor. How much sound gets reflected back to you can add annoying effects and confusion to your recordings. The acoustics in my office aren't great, but there is enough furniture and other items that sound reflections are largely dampened.
The best environment is to use or build a soundproof room. I only recommend this if your ambient noise and acoustics are terrible or if you'll be recording frequently.
Assembling the video required the most labor hours. Small details become increasingly important as you figure out what visuals of your story or message will best relate to the audio. This is partly shown in your storyboard but those are mostly ideas and sketches.
I used four different software products to build and render the visual assets. Most of these are Adobe products that play with each other really well.
My video has screen captures (demos) of our software and the Adobe Creative Suite only offers Adobe Captivate to do this. Not only is the licensing and download of this software very manual and tedious, it's screen capture capabilities were very mediocre. Not worth the hassle in my opinion. Instead, we use Camtasia which runs about $250 per user. Camtasia a great screen capture tool and it also has all sorts of built in editing features and transitions that allow you to make fairly complex demo videos and other compilations.
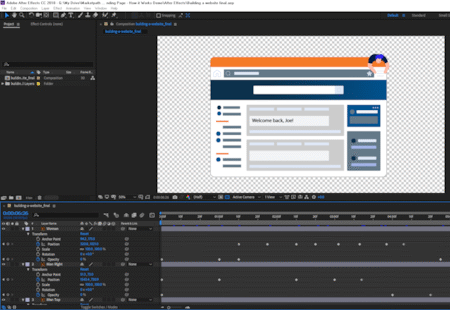 I wanted to ensure my video had some movement to help the messaging resonate. I call these animated sequences squirrels, because after all, most people can't pay attention for more than 3 seconds without needing a squirrel to recapture their attention. Throw a bunch of squirrels into the mix and voilà, you have instant engagement. Ok, so that's not entirely accurate but you get the point, right?
To animate content in your video, you import or build layers and use transitions. Both are accomplished in Adobe After Effects and Adobe Premiere Pro.
I created the more intricate animations in After Effects (like the spinning cogs). I imported a vector graphic from Adobe Illustrator (converted into layers) and then manipulated the individual layers using transitions. The trick here is making sure the layers you want to animate are root layers in the Illustrator file.
Once I built the After Effects animations, I imported them into Premiere where additional transitions were applied between sequences and objects within those sequences.
All this may sound like a lot, but honestly, once I watched a few short tutorials and gave it a try it wasn't too difficult. I also didn't create the original vectors. Marketpath already had a lot of these from our graphic designer but the rest were found on free vector resource sites like freepik.
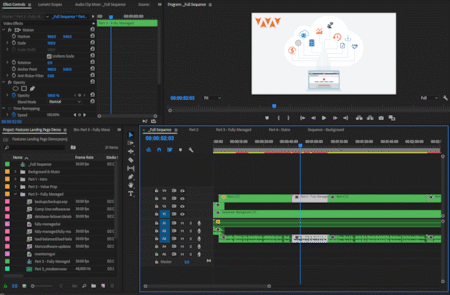 I worked on one part at a time until I felt it conveyed our message and had reasonably effective visuals. Then I'd move on to the next part.
I created all the Camtasia screen recordings, Illustrator, and After Effects content as I needed it. I organized all my sections and sub-sections and their accompanying assets into bins (folders). Without proper organization, you'll end up with a rat's nest of content and no real indication to what scene each asset belongs.
This video had seven sequences in it - one for the background image and music that spans the entire video and 6 smaller sequences. By breaking the parts into their own sequences I can keep the main sequence tracks clean.
With so many imported resources I felt it was important to keep them all on a shared drive and backed up. We use Google Drive File Stream which creates a virtual G:\ drive. So, all the assets were at G:\Marketpath Docs\Marketing\Content\Video........etc. Other employees of Marketpath have access to this marketing folder so the asset paths would be the same, avoiding those annoying content not found errors.
Adobe has Creative Cloud file sync, which I don't use. I'm sure that would do the same job but I've not tried it.
Creating a video takes a great deal of time and effort so it's important to have your storyboard and resulting sequences reviewed along the way. Choose one or two key people and ask that they review each of your parts as you create them and also give a nod for the general direction you're taking the video. Don't wait until the very end and then ask for a review. You may end up rebuilding a great deal more than you anticipated.
One of the biggest changes my staff had for my video is that some assets flew in and out. They thought this looked too much like a Powerpoint presentation. So, I changed them to a fade in and out (which, ironically, you can also do in Powerpoint).
At the end, my team's responses ranged from "That's really great. I'm impressed." to "This will be work until we hire a professional." Can't win 'em all, I guess.
Once the entire video is assembled and approved, you'll need to render it into a watchable video format. I render to H.264. My video size (which must be set at the beginning) is 1920 x 1080, or regular high definition (HD). If you create a video in ultra high def (UHD) you'll be looking at much larger file sizes and slower rendering times.
Streaming is one of the final decisions you'll need to make. We started with a paid Vimeo plan, but moved to YouTube because it was free. Originally, I didn't think we could control the content that appeared after a view completed but, in fact, you can. YouTube is also the seonnd largest search engine on the planet, so for promotional and marketing videos, we thought this was a value add.
Either of those platforms will serve quality video content and downscale it to accommodate network bandwidth and mobile devices. There are also many other video hosting platforms that have their own set of value-add features. I recommend doing your research before assuming YouTube is the best and only option.
I did not get any quotes for this project so I don't know exactly what it would have cost. My guess, for a two and a half minute video is that it would have run me between $3,000 and $5,000. I'm sure I incurred that with all the learning time I had for this first video but in theory, the next videos will cost me at least 50% less.
If you don't have any of the gear or software you will probably spend between $500 and $1,000 to get up and running. Here were my overall costs (not counting my time):
Hopefully, this provided some insight into the complex process and all the interconnected pieces required to produce a single 2.5 minute video. It seems like an enormous undertaking and in some ways it was. But I learned a great deal and should be able to put out other videos at a much faster clip. Not that I should really be doing that. But what can I say? I love to build things!